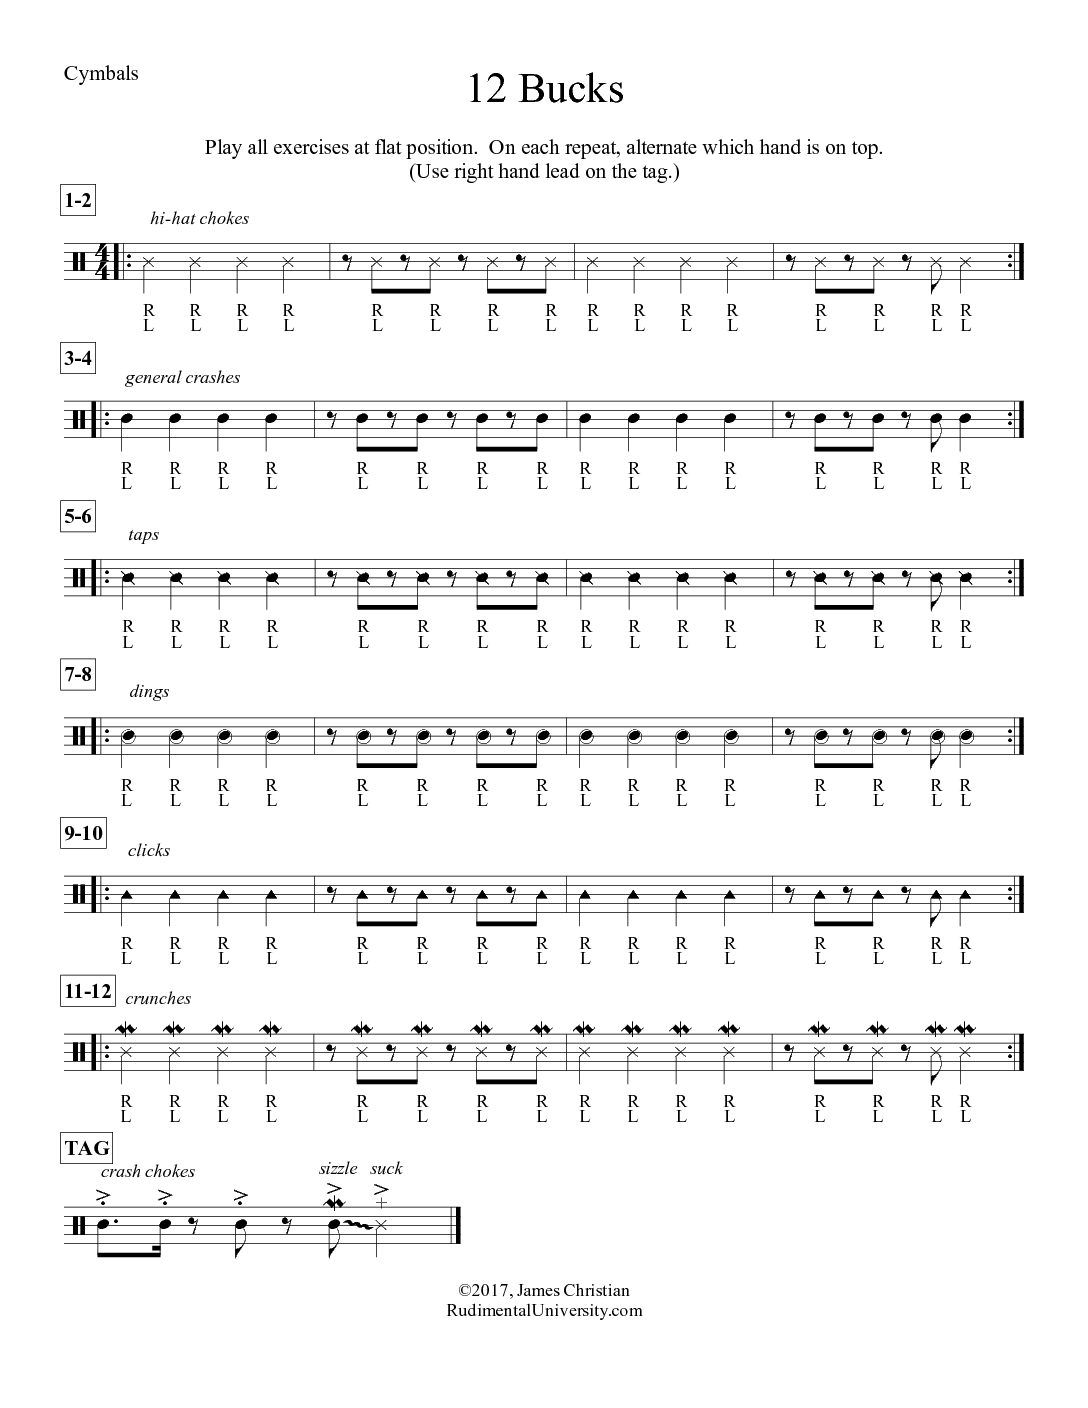
Today marks the first crash cymbals exercise on Rudimental University! In just one exercise, the player cycles through a variety of techniques. This is a really good warm-up for working through some of the most common cymbal effects. As with all the “12 Bucks” exercises this week, this exercise can be played in individual practice, and it can also be played with other percussionists on other instruments.
The exercise is divided into 12 sections comprised of six “pairs” (1-2, 3-4, 5-6, etc.). The first time through each section, play with the right hand on top. On the repeat, flip the cymbals so that the left hand is on top. Many cymbal players and cymbal lines do not work both hands evenly, but I ask… Why not? When both hands are equally strong, you have many more options when it comes to performances.
The same rhythmic structure is used throughout the exercise (except for the “tag” at the end). If you are unfamiliar with extended crash cymbal techniques, there are a few resources online that explain them quite well. Unfortunately, the terminology varies wildly from instructor to instructor. I did come across the Oregon Crusaders’ cymbal line packet, and the techniques are all explained quite well in it: http://oregoncrusaders.org/wp-content/uploads/2015/02/OCP-Cymbal-Technique-Book-20151.pdf (Note: what they call “smashes” are what I call “crunches.” Everything else is the same.)
Here is the breakdown of the techniques:
- Sections 1-2: Hi-hat chokes
- Sections 3-4: General crashes (you can either push the top cymbal in a downward motion or away from your body—your choice)
- Sections 5-6: Taps
- Sections 7-8: Dings
- Sections 9-10: Clicks
- Sections 11-12: Crunches (a.k.a. Smashes)
The tag utilizes crash chokes and sizzle-sucks.
I personally find this a fun exercise to play. It provides good audio/visual variety, and it keeps you on your toes. Happy crashing!