Over the years, many of my students have wanted to learn how to play marching tenor drums. As much as time allowed, I would work with them individually and share the resources I had. Unfortunately, I was limited by space and time. Some of the existing resources were helpful, but students still struggled to know how to go forward on their own. Well, I saw a need and decided to do something about it. In order to multiply my impact and provide a ton of new material, I released the book The Art of Multi-Tenor Drumming in late 2016. It was the kind of book I always wanted to have when practicing, and it was intended as a comprehensive resource for tenor drummers at all levels of experience. So far, the book has been well received. It has been purchased by people in many countries around the world. And I have been very happy to hear good reports from those who have used it.
However, as much as I love working through percussion books, I know it is sometimes most helpful to see someone else actually playing the instrument. Many students have told me they wish there was a good “how to” video series available on YouTube. Well, once again, I am seeing a need and attempting to meet it.
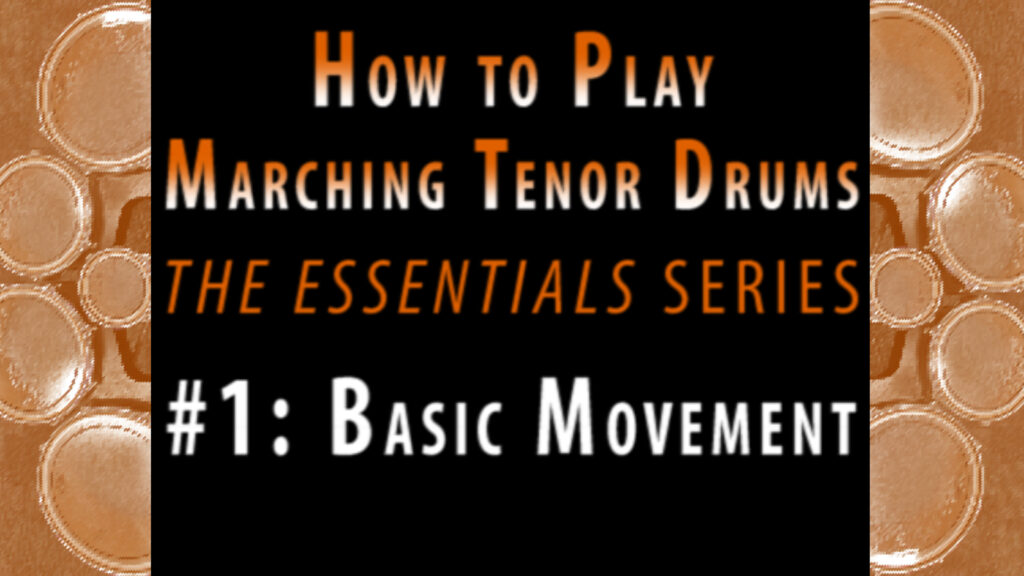
Beginning today, I am launching a new video series intended to help those who are just starting out on tenors. There are seven parts planned:
- Basic Movement
- Around Patterns
- Developing Speed
- Crossovers
- Sweeps & Scrapes
- Essential Vocabulary
- Beyond the Basics
Today’s video will cover playing zones, the X-axis and the Y-axis, and basic movement patterns. For ease of reference, you can read a transcript of the video below. Additionally, you can click on the following image to access the 27 exercises referenced in the presentation.
I think this series will be helpful to a lot of young players–and hopefully provide some helpful ideas for more experienced players too. Please let me know what you think and leave feedback in the comments (either on YouTube or in the comments area on this blog post). I welcome any constructive feedback. Thanks for watching and reading. I hope you enjoy!
–James
TRANSCRIPT
Hello, everybody. My name is James Christian. I’m the 7-time DCA tenor drum champion, and I’m the author of
“The Art of Multi-Tenor Drumming.”
The Essentials Series
With this video, I am starting a new series. I have about seven videos planned. And this is intended to be a fast-track
to beginner tenor drumming. I’ve had a lot of students in the past say they wish there was something to help them get started, as far as a video series goes. So I’m going to create it.
After this, I’m planning a much longer series. I’m planning over 100 videos in that series. It will go into much more detail on all sorts of things. It will start at a much more basic level, and it will go to a very advanced level. But this series is intended just to get you started playing on day one. And it will get you going pretty much from the start.
Most people, when they first start playing tenor drums, they enter it in two different ways. One is in junior high when they’re playing junior high pep rally music. Or if they haven’t played them up to that point, when they get up to high school, if they want to be in the tenor section of the drum line, they may start then. So this video series will get you going and get you started with the fundamentals that should help make you successful.
Before we begin, I want to cover just a couple of things. As I said, this is a fast-track series, so I’m not going to cover a lot of fundamentals of general music or even percussion. I’m going to just focus on tenor drumming. So I’m not going to cover how to read music, and I’m not going to cover basic snare drum technique.
I’m going to assume that you have been taught by someone, or have taught yourself, the general up-and-down motion. On tenor drums, you have to play side-to-side, and you have to play up-and down. So the side-to-side motion is called the X-axis. And the up-and-down motion is called the Y-axis. I’m not going to focus much on the Y-axis movement.
I would say, when you’re practicing, you should spend about 50% of your time playing on a snare drum or single drum and about 50% of your time playing on the tenor drums. You don’t want to get so focused on the X-axis that your Y-axis technique gets sloppy. So do focus on that. And if you have a good, solid snare drum technique, then it will sound good moved around the drums. If you have a bad snare drum technique, it will sound sloppy on one drum. And it will sound even sloppier moving it around multiple drums. So keep your snare drum technique
going while you’re working on these.
Playing Zones: Getting the Best Sound
The next thing I want to focus on is the way we get sound on tenor drums. There’s an optimal playing area called the “playing zone.” And if you get too close to the center of the drum, you get a really dead sound.
[dead thud sound]And if you hit too close to the rim, you get this real high “pingy” sound.
[high pingy sound]So the optimal playing zone is about two inches away from the rim.
[resonant, articulate sound]You get a much better sound there. So that’s your optimal playing zone.
So as you’re moving around the drums, really focus on hitting there. When you’re up close on the top two drums here, the playing zones–you’re going to want to move right to the center up here. And when you’re moving down the drums, you’re going to want to move closer to those drums.
So it’s okay to hit anywhere on the drums. It just needs to be within that distance from the rim.
Optimal Movement: Break from the Elbow, Not the Wrist!
The next thing I’d like to talk about is a general principle called: breaking from the elbow, not from the wrist.
This talks about the X-axis motion. When you’re turning, a lot of really sloppy beginning tenor players–and sadly some who’ve been playing for a bit longer–they tend to do this: They break the motion–their general playing position–they break it from the wrist,and they’ll do something really sloppy like this.
[sloppy demonstration]That looks really sloppy.
It also messes up your anatomy, because you don’t have the same control over the stick when you break it right here.
So you want to keep your arm as one unit moving up and down. And so you’re going to break this position from the elbow. And you’ll come down and play it that way. So you maintain the same technique you’d play on snare drum. You’re just moving the arm at a different position.
So this is how a better technique would look:
[demonstration]So really focus on those two things as you’re playing. Focus on the playing zones–hitting the drums in the right spot. And focus on breaking from the elbow, not from the wrist.
Now when you play something on one drum, it’s just a single drum. When you move it around the tenor drums, that’s called an “around pattern.” So this video right here is only going to focus on general movement. It’s going to focus on around patterns. And it’s going to be straight 8th notes, so no complicated rhythms. We’re just going to focus on hitting different drums and getting you used to moving in different ways.
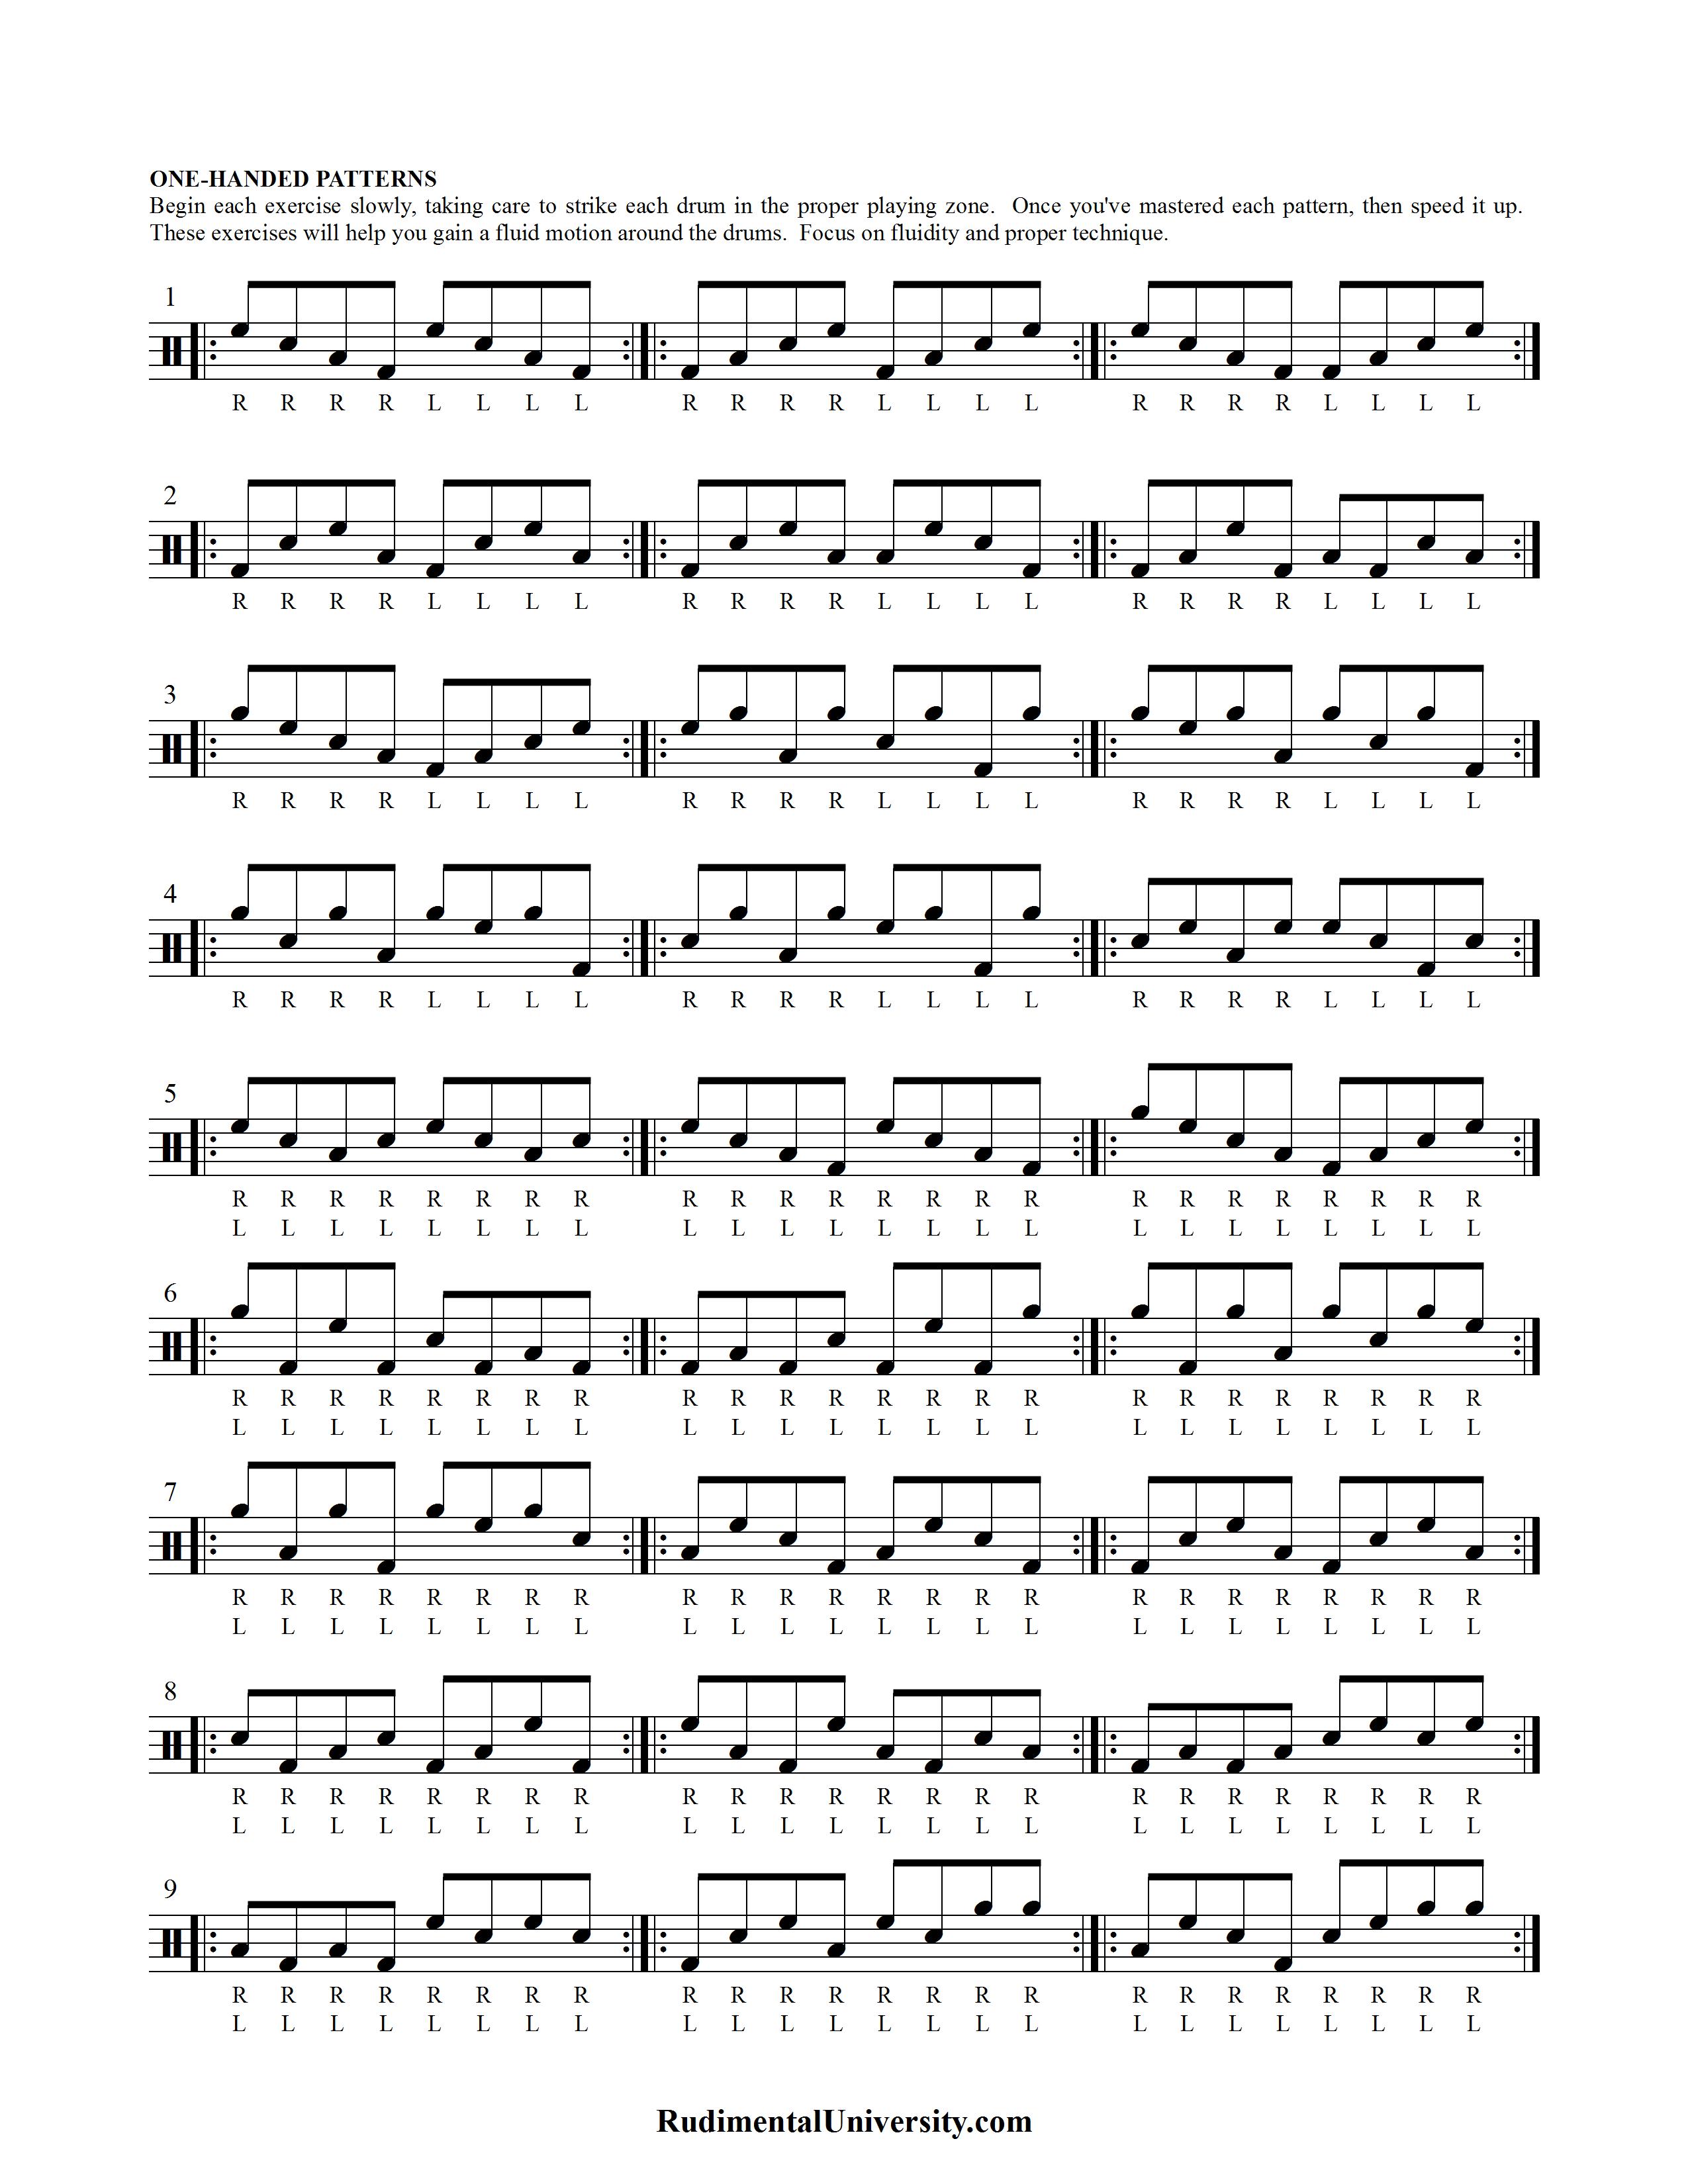
The exercises for this video come from what I originally wrote for my tenor drum book. And I actually took it out. It’s the one page that did not get published. You could called it “the missing page.”
Actually, this page got expanded into about 50 pages. I started with it as just some basic movement exercises, and then I went right into rudiment exercises. And I showed it to my former teacher, Rick Beckham. And he saw it, and he thought, “I could do something much more with it.” And he got inspired from that and wrote about 50 pages’ worth of exercises.
So if you want some more movement exercises, there’s a huge library worth of them in the book.
But in this video, I’m just going to focus on one page worth of stuff. I’m not even going to do every single exercise. I’m just going to do the first three lines or so. And then I’ll have this page as a download, and I’ll put the link below, and you can download it and practice and get some more movement exercises down.
So without any further ado, let’s go ahead and start playing.
Exercise #1.1
This first exercise is going to be just straight down the drums on 8th notes. You’ll notice I’m going to look at the drums first– and I recommend doing this. Look at it, and make sure you’re hitting in the right playing zones and using the proper breaking technique from the elbow. And then as you feel more comfortable with it, look up and try to still maintain those playing zones.
If you can hear you’re not hitting in the same spot, glance down, fix yourself, and then look up. Because probably when you’re marching or needing to look at a conductor or a drum major, you will need to be able to play without looking at the drums 100% of the time. Occasionally you need to, but try to do it to where you get it really quick and then look up.
So here you go. The first exercise is straight down the drums: 1234.
[line 1, exercise 1]Now a little bit faster.
[faster demonstration]I want to point out on this that the free hand, when you’re not playing, some people have a different strategy, or a different philosophy, where you should always keep the free hand over drums 1 and 2 when you’re not playing. Something like this:
[demonstration]And that’s totally fine if that’s what your instructor is telling you to do and they’re really adamant about it. Then go ahead and learn it that way. For now, I would just say focus on proper playing zones and proper breaking from the elbow. That should be enough to get you started. And just get the other hand out of the way.
And then, as you become better and are more comfortable with the proper playing zones and all that, then you can start thinking about what you’re doing with the free hand.
So my suggestion is to just get rid of the free hand. Just get it out of the way and focus on proper playing for now. And then go with whatever your philosophy is on the free hand later down the road. And then start incorporating that into what you’re already doing.
Exercise #1.2
So here we go. The second exercise is going to do the same idea, except we’re going to go up the drums. We’re going to go: 4321.
[line 1, exercise 2]A little bit faster:
[faster demonstration]As you’ll notice, I barely hit the rim there, and I adjusted. I wasn’t looking at the drums, and I could tell I slightly got off on the angle, so I adjusted. So as you’re doing this, practice it over and over again until you get just perfect reps
and adjust to where you can fix it on the fly.
Exercise #1.3
This next exercise is going to combine the two movements we’ve had before. So the right hand is going to go down the drums, and the left hand is going to come up. So we’re going to combine them.
[line 1, exercise 3]A little bit faster.
[faster demonstration]
Exercise #2.1
All right, so far we’ve moved down the drums melodically. Now we’re going to do a side-to-side motion. So the right hand is going to start on drum 4 and move across. And then the left hand is going to do the same thing. So here you go:
[line 2, exercise 1]A little bit faster.
[faster demonstration]
Exercise #2.2
You could also practice the same exact motion starting on drum 3 and going across that way. We’re going to skip that. If you want to pause the video here and practice that on your own, you can.
But now we’re going to combine the two motions. So your right hand is going to go across, starting on 4 and moving that way. And the left hand is going to start on drum 3 and move across going that way. So here we go:
[line 2, exercise 2]And a little bit faster.
[faster demonstration]
Exercise #2.3
This next exercise is going to go in a circular motion. So starting with the right hand, you’re going to go 4314. It will look like this:
[demonstration]And then you’re going to do the same thing with the left hand, and it’s going to go 3423. Like this:
[demonstration]So you’re going to do both back to back. So here you go on this one:
[line 2, exercise 3]And a little bit faster.
[faster demonstration]
Exercise #3.1
Now we’re coming to the third line, and we’re going to use the spock drum. So far we’ve only used the main four drums in a quad-tom setup. Now we’re adding a fifth drum.
If you do not have five drums–if you have six drums–then I would recommend doing these exercises twice, once with spock #1 and once with spock #2. So you basically get double the exercises here.
If you don’t have a spock drum at all–if you only have quads–then most stands have some kind of connecting element that you can play on. Or if you’re carrying them, with the harness there, you can probably hit something here.
If you have a unique setup where there’s nothing there that you can really hit, then just hit drum 1 twice, and you’ll get the general gist of the motion.
So here you go. This first one is going to go down the drums like we did at the beginning. Except now we’re going to start on the top drum–the spock drum–and then come back up. So here you go:
[line 3, exercise 1]And a little bit faster.
[faster demonstration]
Exercise #3.2
All right, two more exercises on this line. We’re going to do something that I call “anchored patterns.” So we’re going to have our spock drum as our “anchor” drum, and then we’re going to move the hand away from the other drums.
I tend to think of it as kind of like playing on a drum set, how you have the snare drum in front of you and you can reach out and hit cymbals and toms. This is the same kind of idea here.
So the first one: It’s going to be straight 8th notes again. The downbeats are going to be on the outer drums, and all the upbeats are going to be on the spock drum. So here you go. Here’s the first exercise slowly:
[line 3, exercise 2]The same thing a little bit faster:
[faster demonstration]
Exercise #3.3
The final exercise on this line is the same idea, except now you’re going to start on the spock drum and move out on the upbeats.
[line 3, exercise 3]The same thing a little bit faster:
[faster demonstration]Do be careful not to accent any of the drums if the accents aren’t written. Try to keep it really smooth and consistent in the volume.
All right, like I said, you can download the exercise page that has more exercises like this. And if you want a lot of exercises, you can get my book, “The Art of Multi-Tenor Drumming.”
Exercise #9.2
I’m going to finish off the last few exercises on this page, just to show what all you can do. This is going to combine
side-to-side motions, spock drums, and all of that. So here is kind of where these general motion patterns lead. So here you go. Here are the final two exercises:
A little bit faster:
[faster demonstration]
Exercise #9.3
Now the final exercise is the same idea as the previous exercise, except we’re going to go in the opposite direction
starting on drum 3. Here you go slowly:
And a little bit faster:
[faster demonstration]
Conclusion
And that will do it for the first video in this series. In the next video, we’re going to start applying different rudiments
with all these different around patterns. So join us for the next video.
Again, you can download the exercise packet at the link below. And if you like this video, please “like” it, and comment on it, and share it, and spread the word to let other people find out about it.
Thank you very much. Have a good day!
Do you have any additional thoughts on technique or playing zones? What do you do with the free hand when playing one-handed parts? What do you think of this series? Your feedback is very helpful, and I’d love to hear your thoughts.