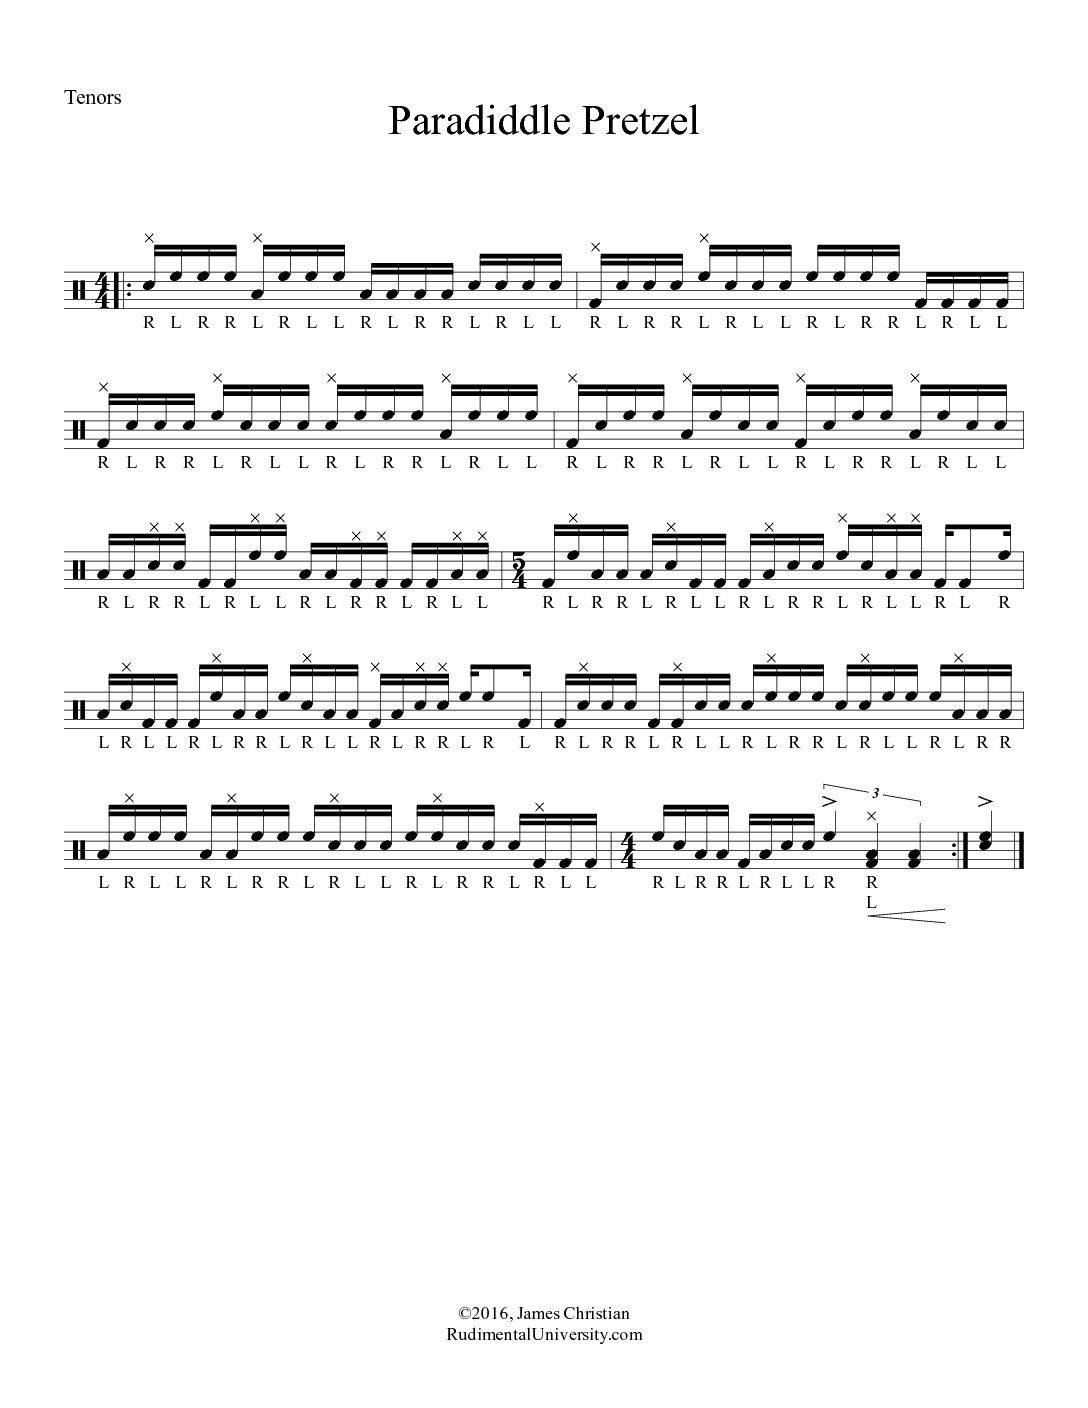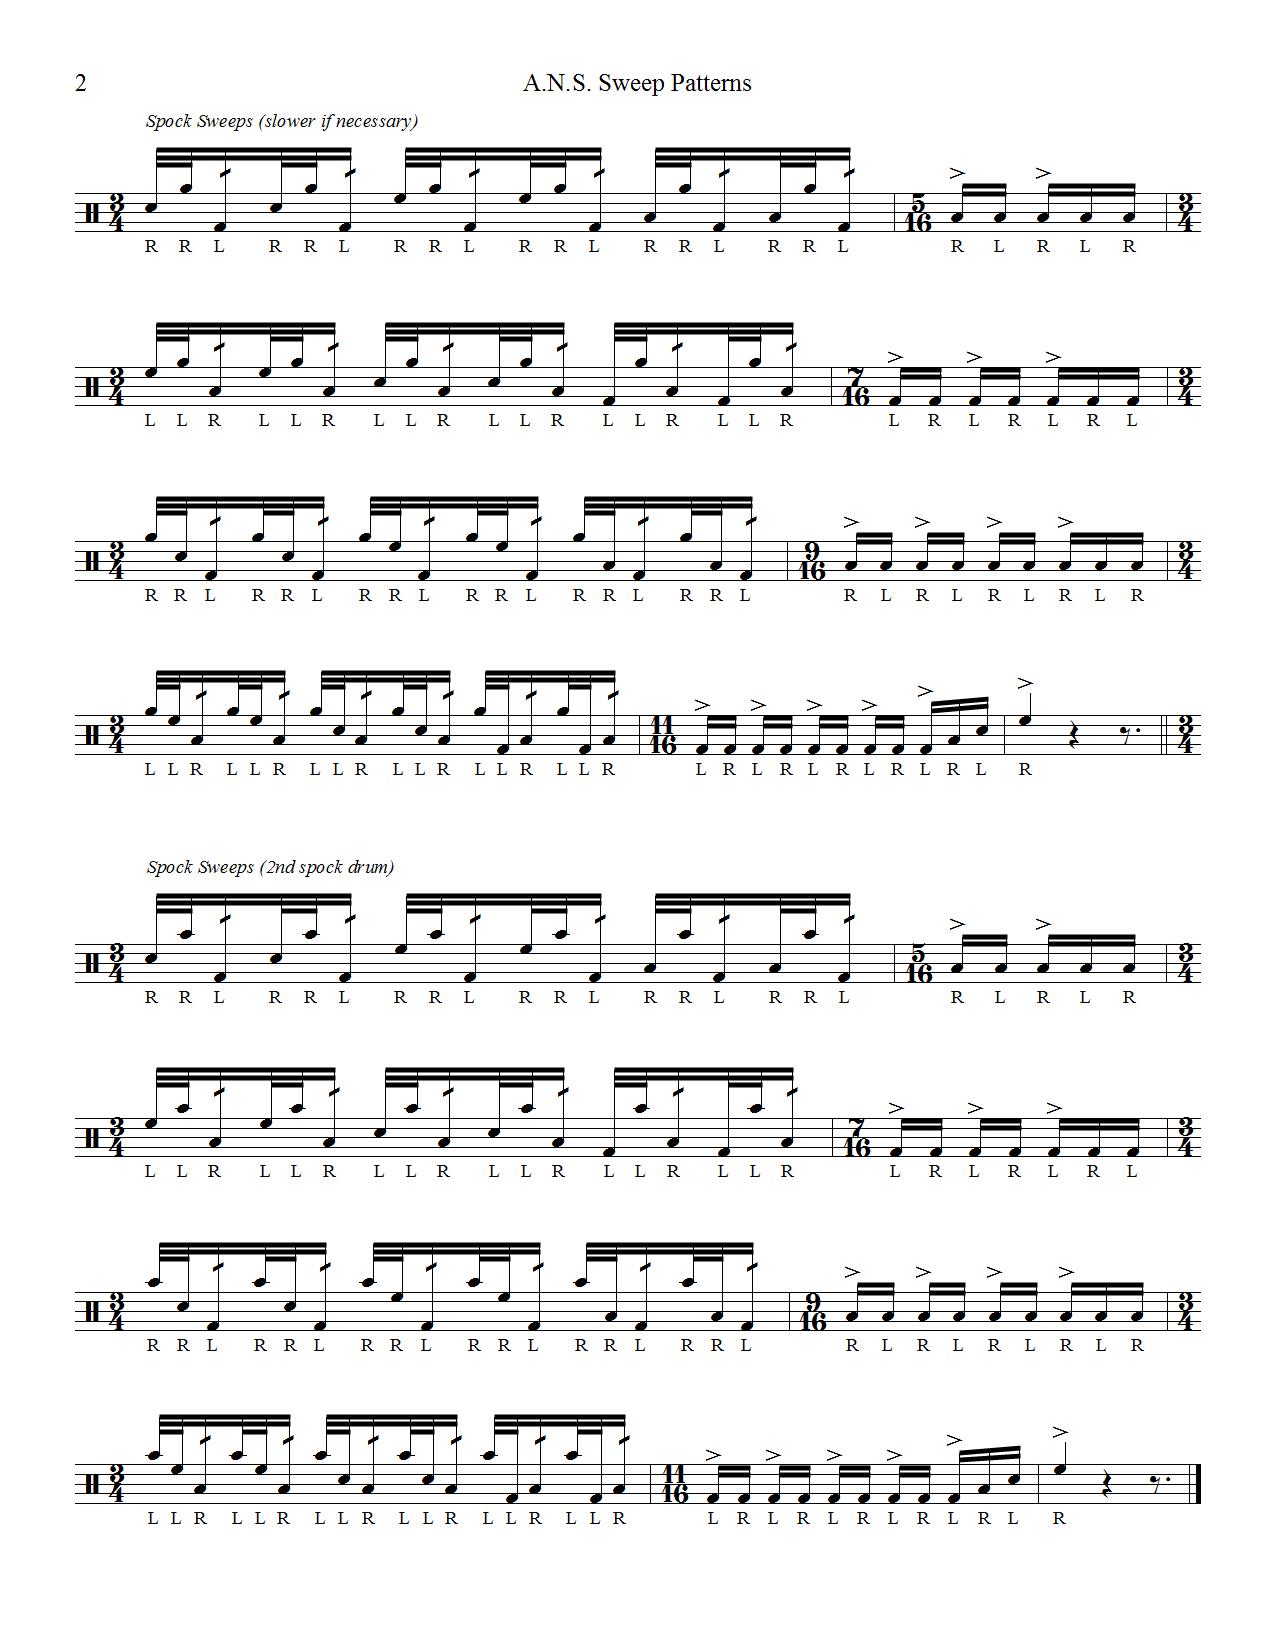
Click on the image to enlarge or click here to download in PDF format.
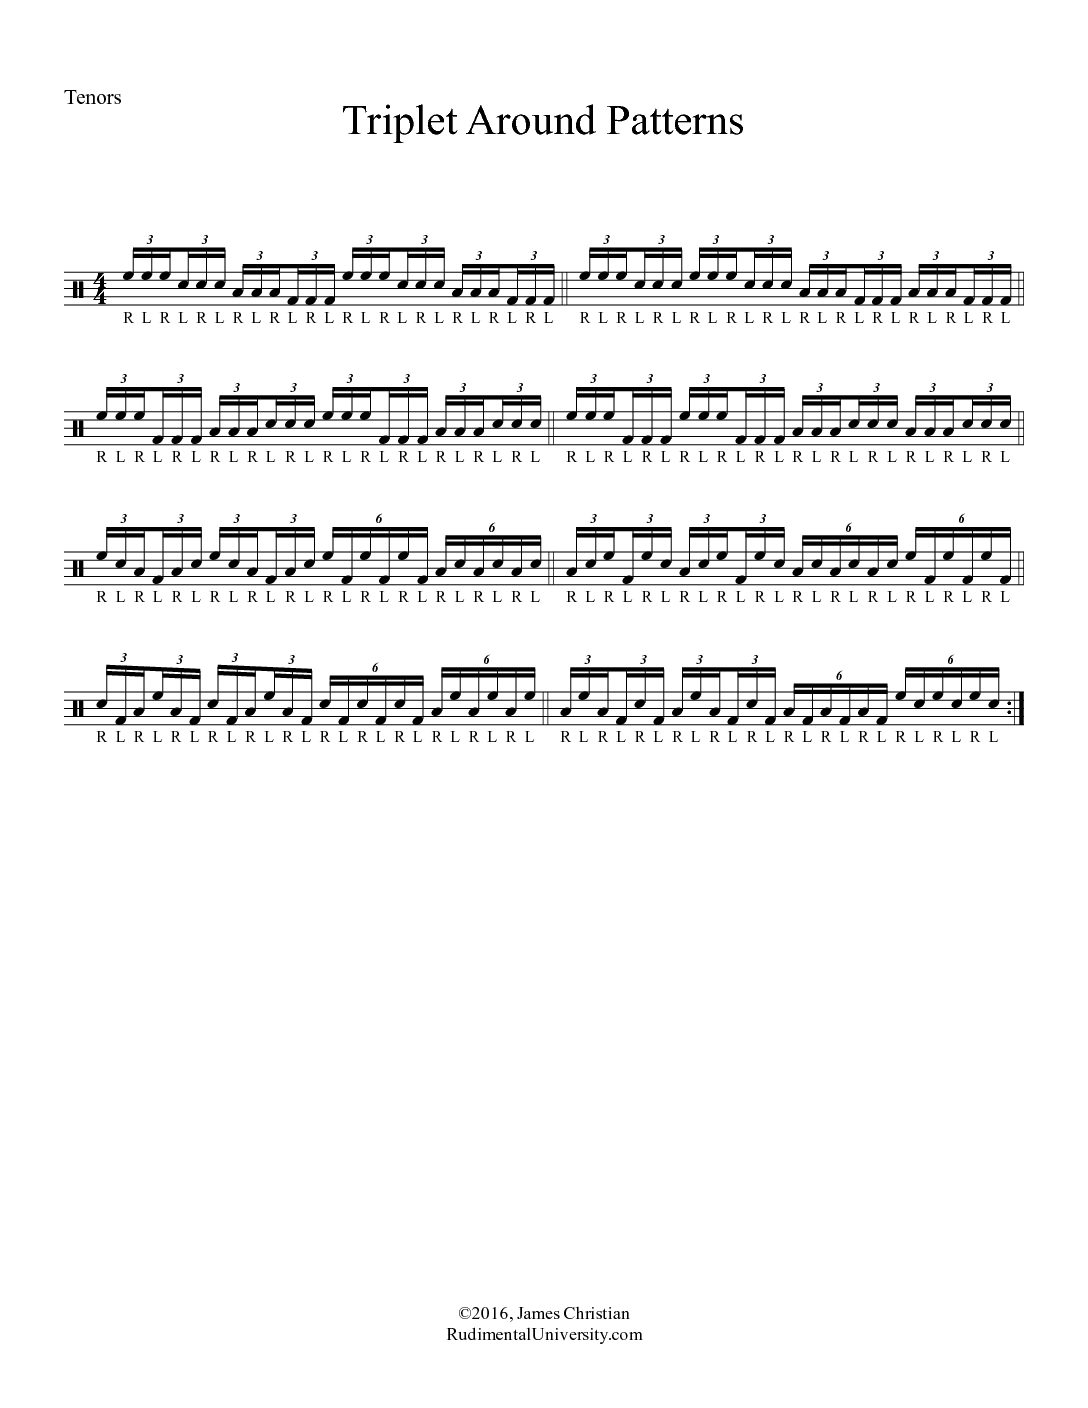
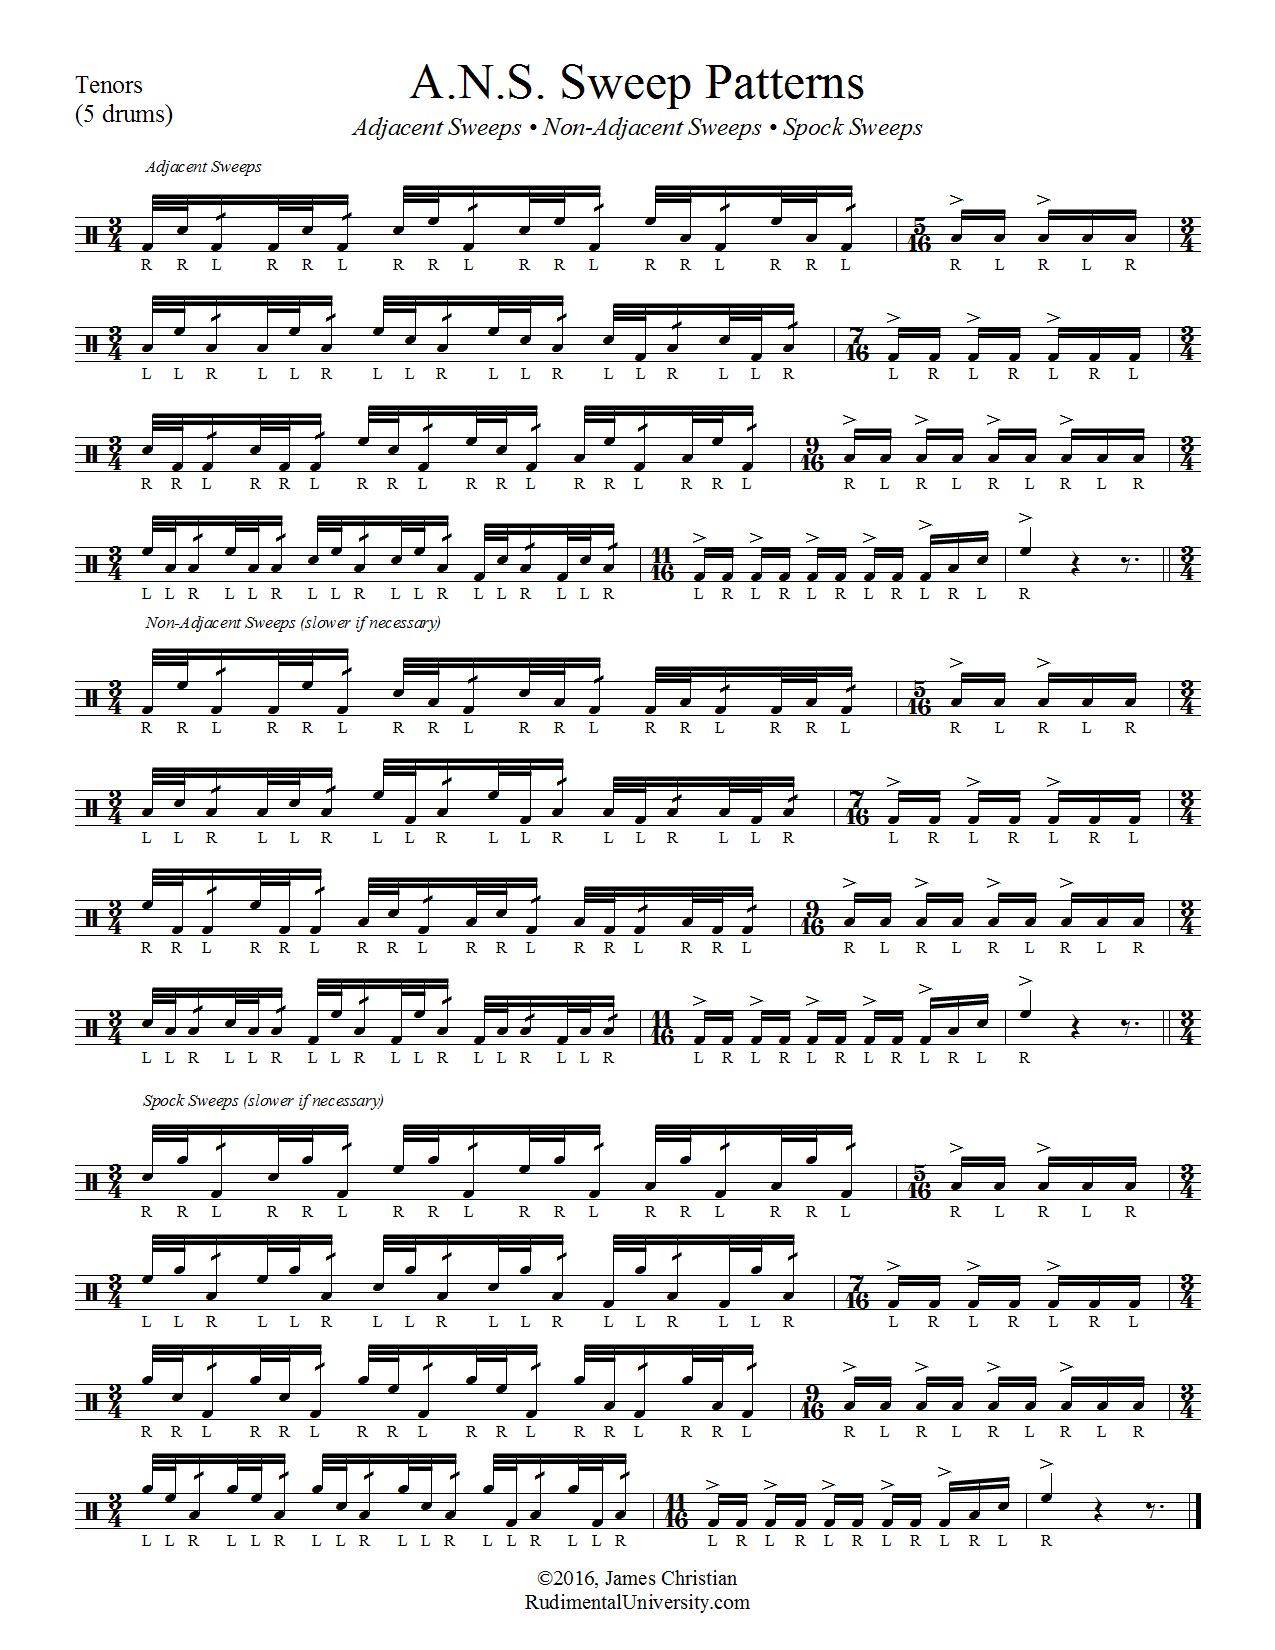
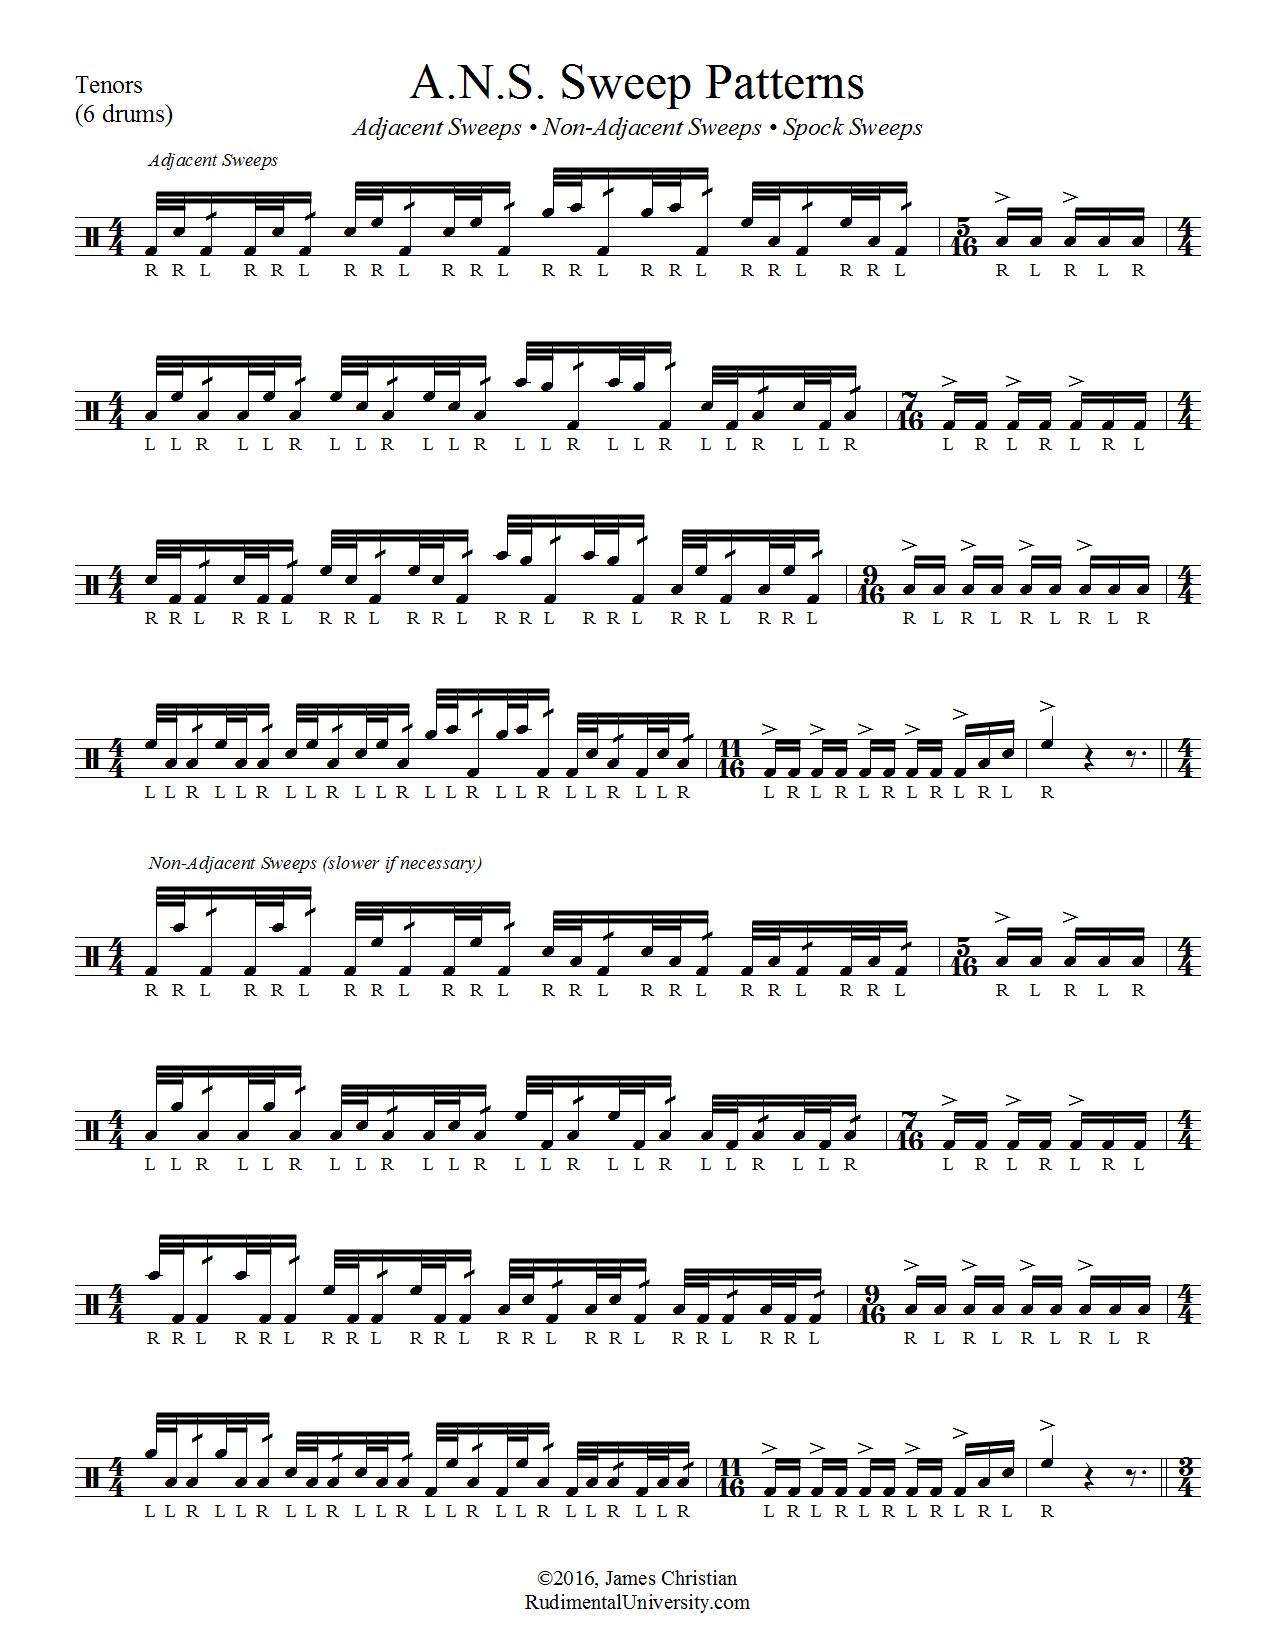
Click on the image to enlarge…
This exercise has gone through many tweaks and additions over the years. In its current version, I think it’s a great tool in the arsenal of any percussionist. When I first encountered this exercise, the first four sections were taught to me and the other students at Princeton High School (Princeton, Texas) by Rick Beckham. This covered the accented 8th notes off the right hand and left hand, plus the accented 16th notes off the right hand and left hand. He later added the next four sections (8th note flams leading with the right and left, plus the accented paradiddle patterns leading with the right and left).
The four main patterns—8th notes, 16th notes, flams, and paradiddles—are great for developing the control needed to distinguish accent and tap heights. I have used this core exercise with several different drum lines, and it has been quite effective.
Over time, I decided to expand the exercise. In personal practice, I used the basic accent structure on a number of different rudimental patterns. When teaching it to a full drum line, I decided that I wanted to write a mallet part that went through the circle of fifths, covering all 12 major keys.* I also wanted a bass drum part that worked split 16th note triplets and 32nd notes. So I picked two of my favorite rudimental patterns that worked with that rhythmic structure to add sections 9-10 and 11-12. In short, this exercise has something really useful for every section.
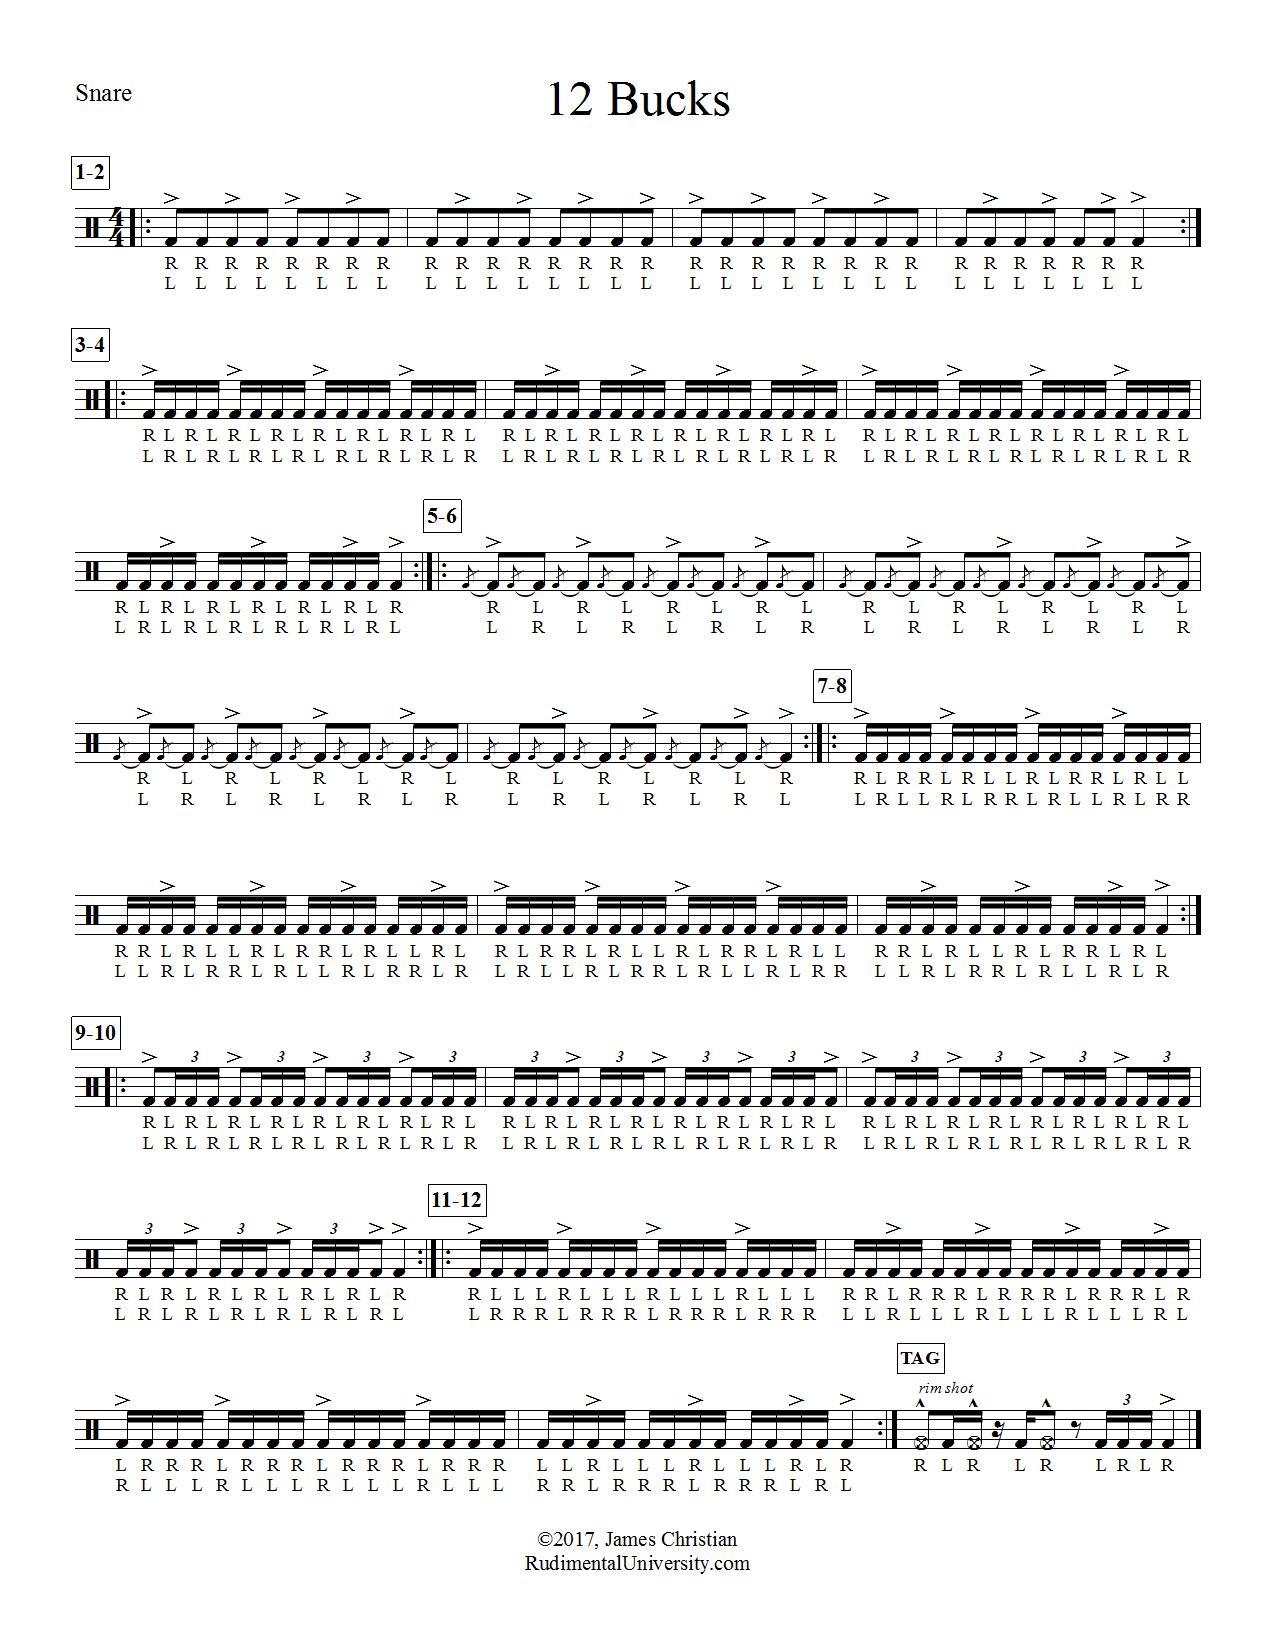
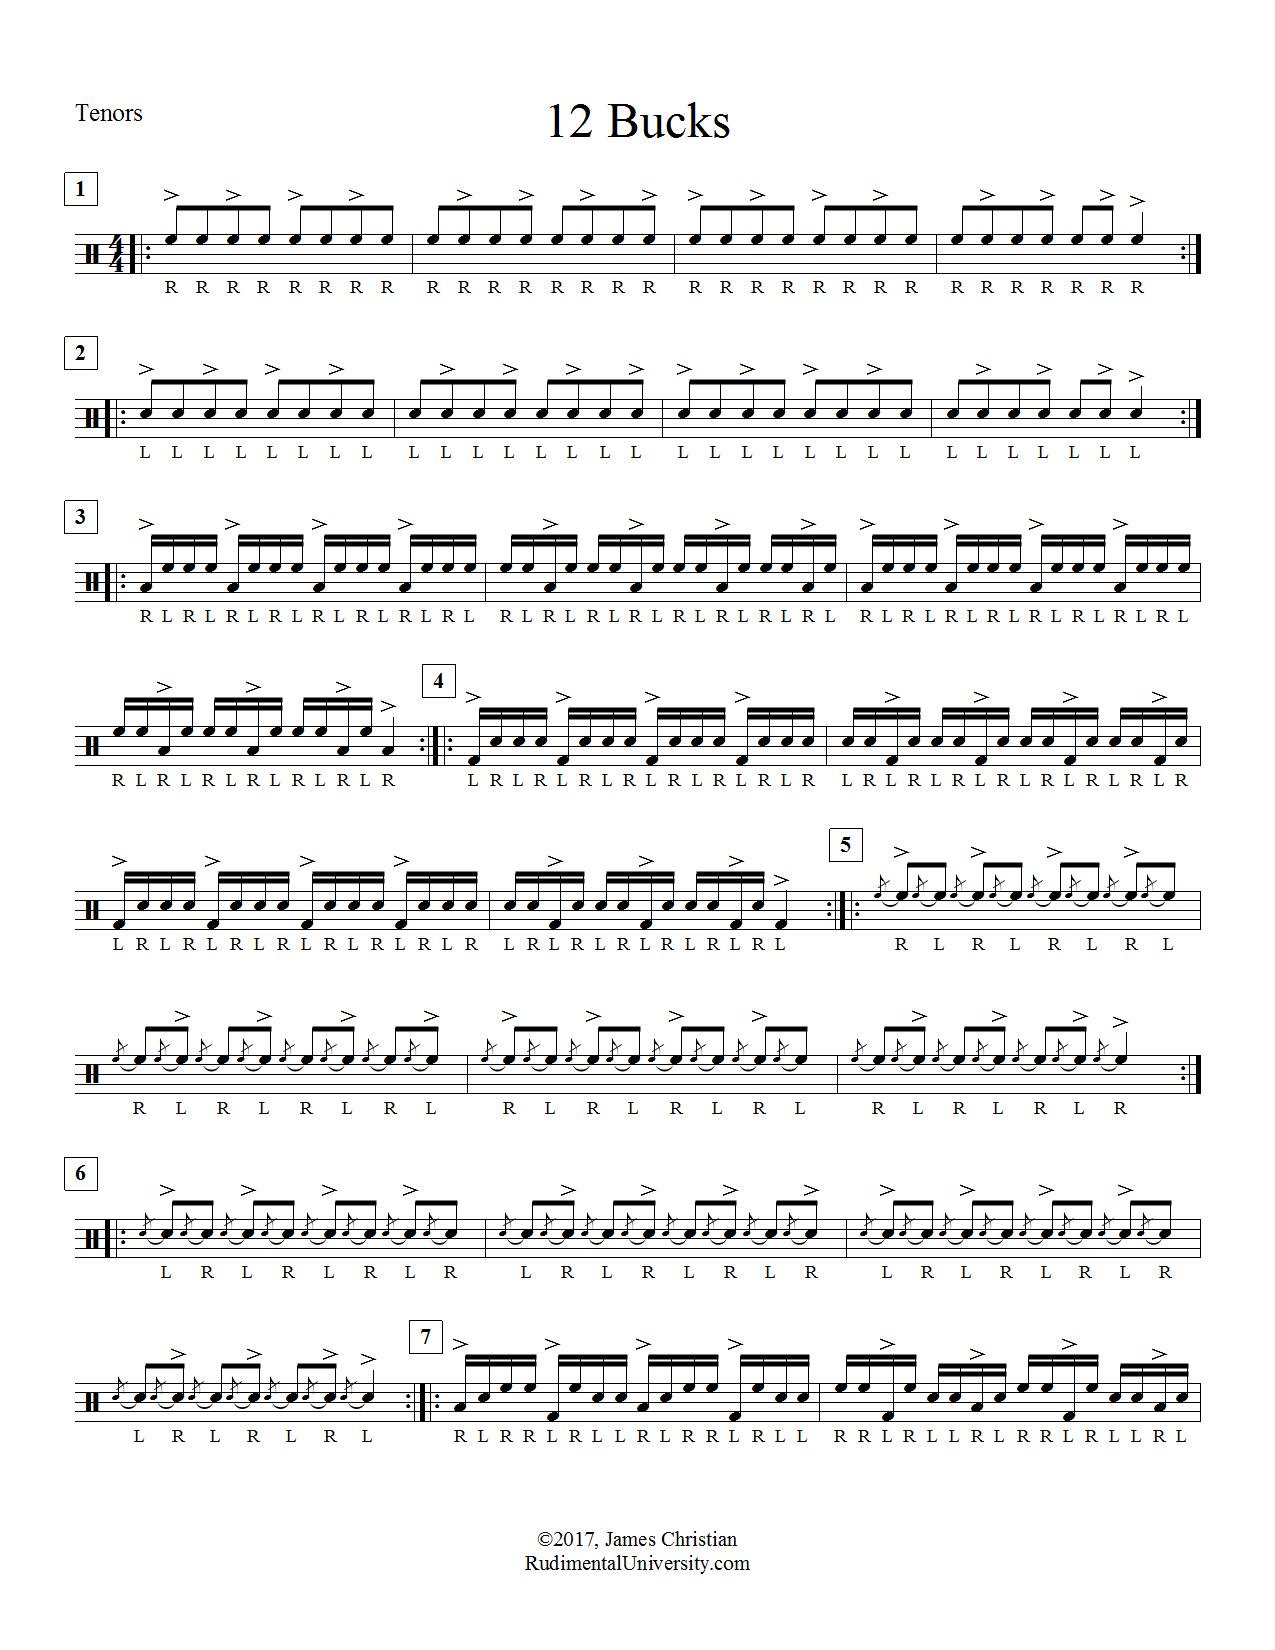
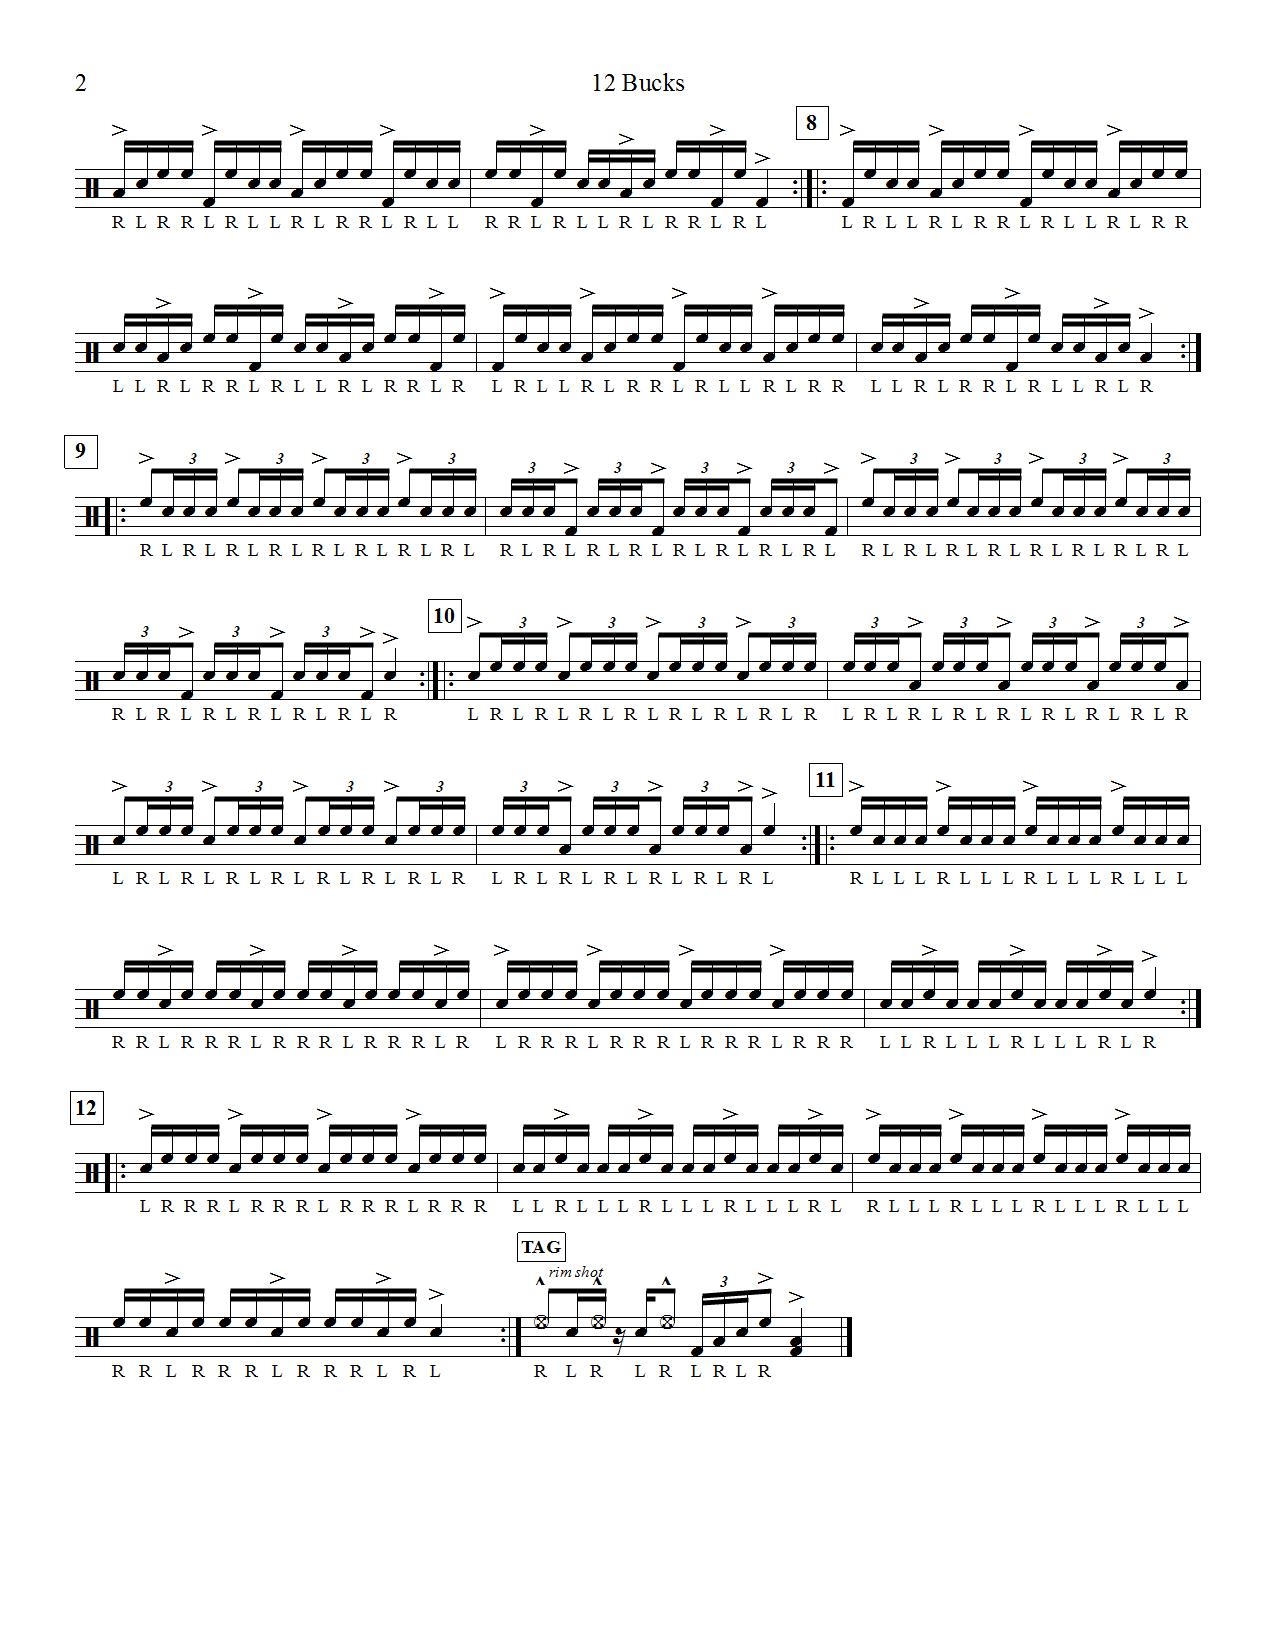
Since 12 sections are covered by going through the circle of fifths and the snare drum part is similar to the standard “Bucks” exercise, I decided to call the exercise “12 Bucks.” Here is the breakdown of the skills required for snare drum and tenors:
- Sections 1-2: One-handed accented 8th notes. Focus on maintaining a clear distinction between accents and taps. Keep your taps low and controlled. Make sure your accents are strong, not wimpy. The tenor exercise is deliberately on one drum, so that the player can focus on the Y-axis motion and the fundamental accent/tap control.
- Sections 3-4: Alternating accented 16th notes. This should follow the exact same technique as sections 1-2, except the opposite hand is now “filling in” the 16th notes. All taps should be consistently at the same height and volume. The tenors now move the accents to an adjacent drum. Keep the accents strong and the taps consistently softer.
- Sections 5-6: Alternating 8th note flams. These sections are excellent for focusing on the three heights of accents, taps, and grace notes. The accents and taps should remain the same from the previous sections. The additional grace notes should be softer and lower than the taps. Once again, the tenors are deliberately on one drum in order to focus on the fundamentals of good flam technique.
- Sections 7-8: 16th note paradiddles. These patterns get a bit trickier. Watch out for the sticking on measures 2 and 4! The key to these section is that they should sound the same as the 16th notes in sections 3-4. Do not let the “diddle” part of the paradiddles sound weaker or stronger than the singles you played in sections 3-4.
- Sections 9-10: Single stroke fours and single stroke sevens. These rudimental patterns get your hands moving a bit quicker with the 16th note triplets. They also require more precise timing focus. Many drummers have a tendency to “cheat” the length of the initial 8th note by starting the triplet too soon. Of course, you should practice the whole exercise with a metronome, but this section would especially benefit from doing so.
- Sections 11-12: “RLLL” quad groupings. Once again, the 16th notes patterns should sound the same as sections 3-4 and 7-8. Of course, these sections require more finger control in order to move each hand at the speed of 16th notes.
- Tag ending: A final syncopated measure to cap off everything! Notice that the snare and tenor triplet rhythms are slightly different. The tenors start on the downbeat, while the snares conclude on the upbeat. Both parts should be played precisely in time in order to hear the tradeoff between sections.
Have fun learning these patterns. Once you have them down, be adventurous and create your own variations!
*[Yes, I know there are technically 15 keys, but I’m not going to get into that debate right now.]